Using iDoceo Rubrics to assess A-Level Practical Endorsement.
This is an upgrade from using Excel tracker to a much more interactive and portable alternative where you can assess easily by tapping on…
This is an upgrade from using Excel tracker to a much more interactive and portable alternative where you can assess easily by tapping on the rubric on your iPad. Thanks to iDoceo!
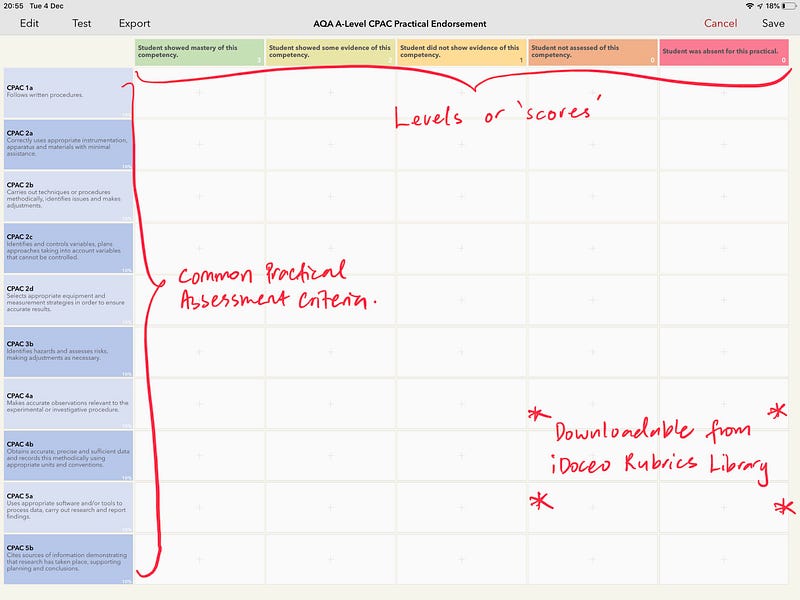
1. Download my AQA A-Level CPAC Practical Endorsement Rubric from iDoceo Rubric Library.
This rubric is suitable for all Science subjects (Physics, Chemistry & Biology). You can add subject specific criteria in addition to this.
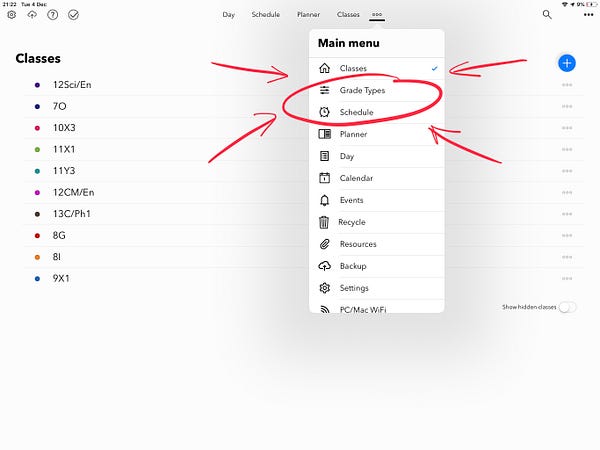
Go to Grade Types ➡️ Add (plus button) ➡️ Browse Online Rubrics Library ➡️ Search for AQA A-Level CPAC Practical Endorsement

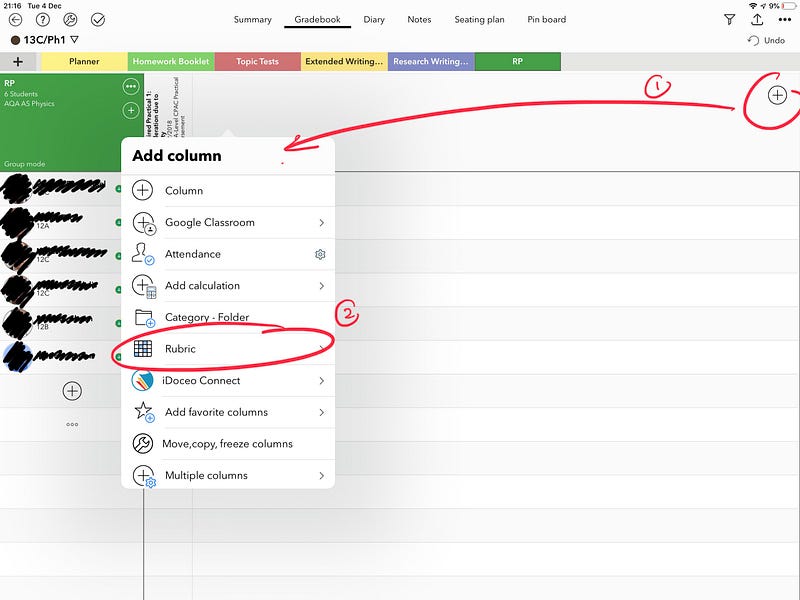
2. Create new tab in your gradebook for Required Practical and create a column for your practical.
Add column ➡️ Rubric ➡️ AQA A-Level CPAC Practical Endorsement ➡️ Type the name of your practical as the header
3. Begin assessing your students practical.
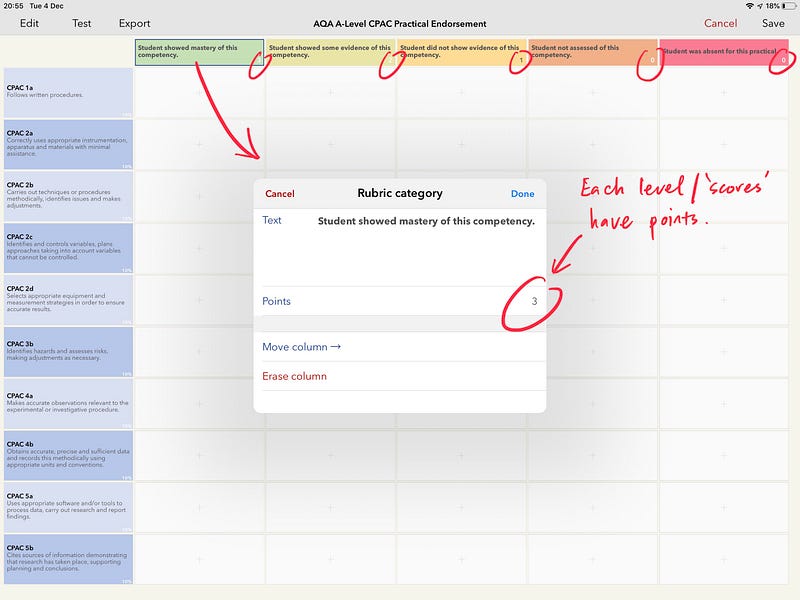
- The first row shows the different level of competency with different scores/points for each level. (In AQA Excel tracker, they are labelled as Green, Red, White etc)
- The first column is the CPAC with its descriptions.
- On each row of CPAC, tap on where the student competency level is.
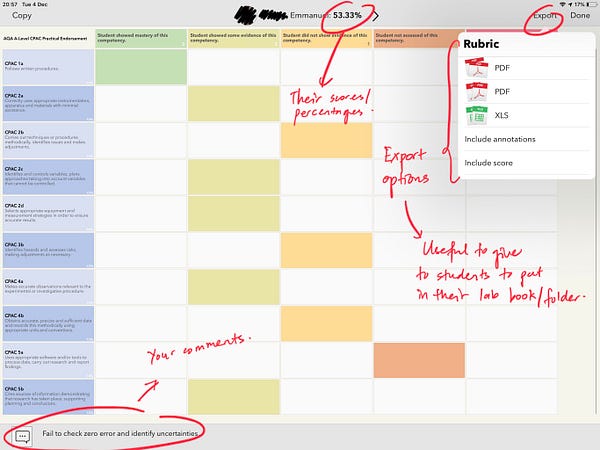
- The rubric will show a percentage of their competency. (It’s not really required, but it’s neat and nice to know and have it there)
- You can add annotations/comments for the student including add attachments (pictures etc.)
- Tap the arrow next to the student’s name to move to another student.

The rubric levels of competency with its points are shown at the bottom right (circled below).
- Student showed mastery of this competency. (3 points)
- Student showed some evidence of this competency. (2 points)
- Student did not show evidence of this competency. (1 point)
- Student not assessed of this competency. (0 point)
- Student was absent for this practical. (0 point)
This values are editable. All of the CPAC are split equally out of 100%.
4. Adding annotations.
Tap the text bubble at the bottom ➡️ Write your comments/annotations ➡️ You can add various attachments!

5. Export your rubric results.
Once finished, you can export the rubric results for each individual student either PDF or Excel (.xls) file. You can print them and placed them in their lab book/folder as a record.

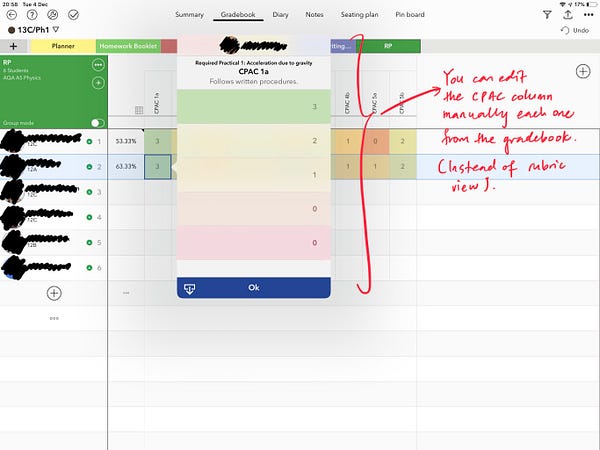
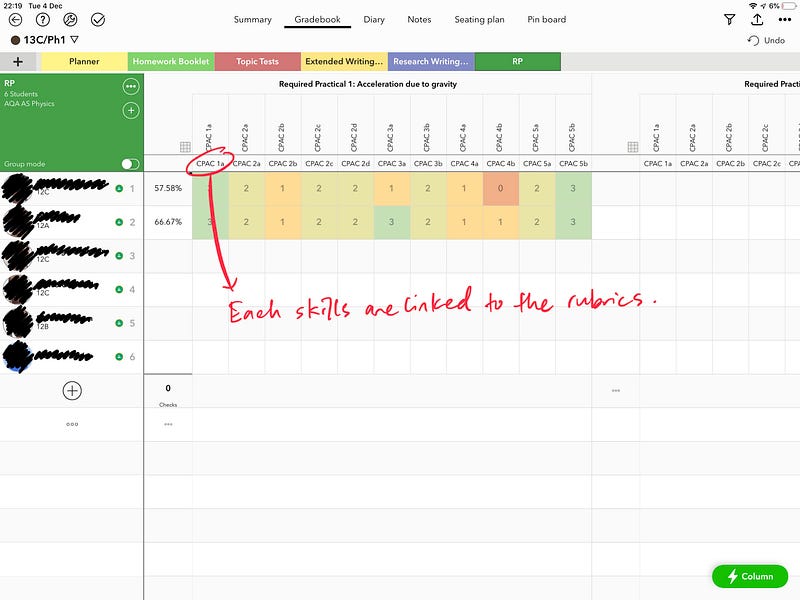
6. Gradebook view & edit rubric in gradebook tab.
Your rubric criteria (CPAC) are ‘nested’ (or as subcategories) inside each of your Required Practical Activity. You can expand them by double tapping, and it will show each individual points for each CPAC.
You can also edit the points for each CPAC form the gradebook, instead of in rubric view.

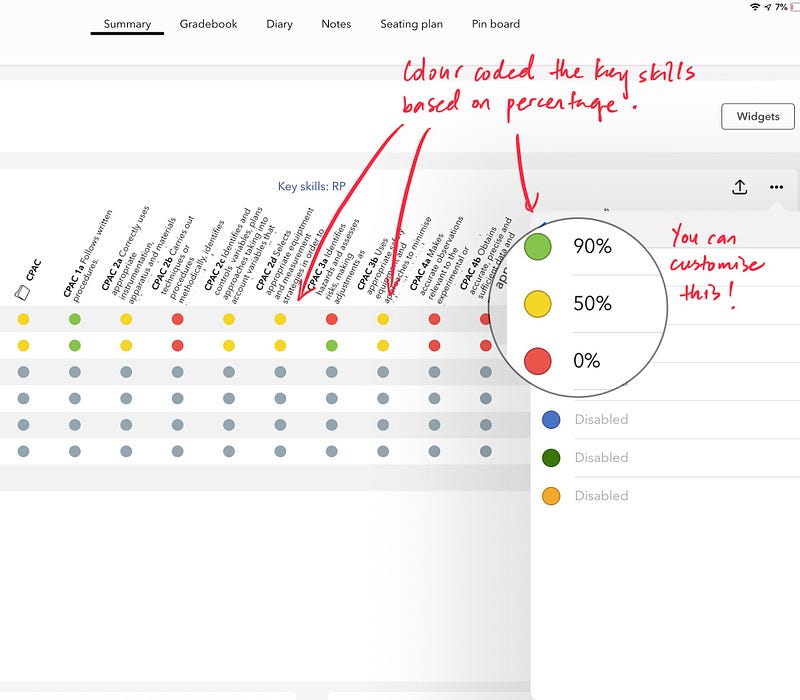
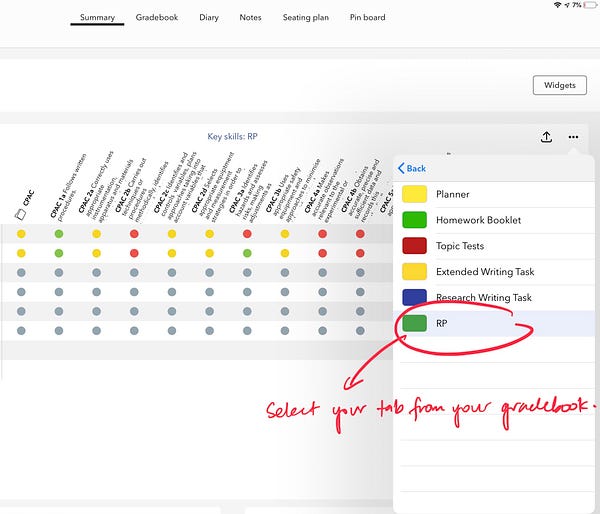
How to show an overview based on CPAC competency?
This are slightly more steps to accomplish this. First of all, it will look like this;

We will be using the widget feature on the summary page of the class.
- First, you need to create ‘Key Skills’. (Click here for how-to)
- Your ‘Key Skills’ might look like this;
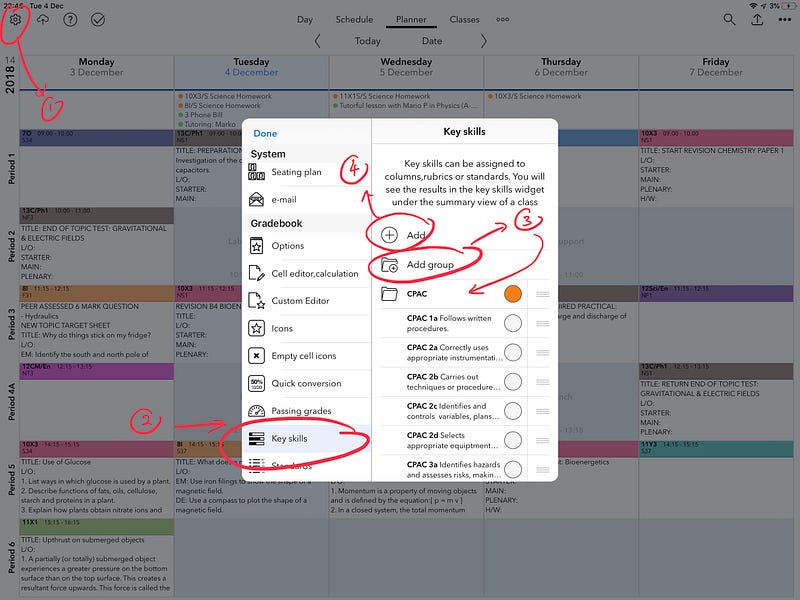
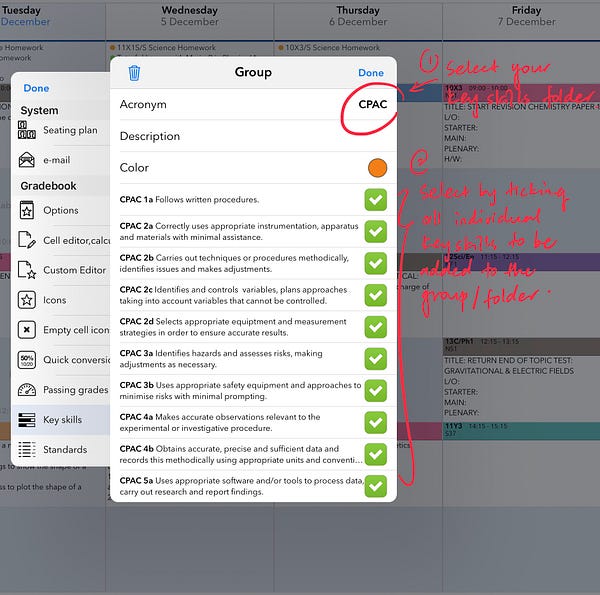
3. Link ‘Key Skills’ to the rubric previously.
4. Your gradebook tab will now look like this, with the Key Skills acronym shown on the column;
Now, go to Summary ➡️ Widgets ➡️ Select ‘Key Skills ➡️ You can rearrange your widges if you want to ➡️ Then, select your gradebook tab of your Required Practical.

You can customise the colour coding. By default, they are as follows;
ALL DONE! Now you can identify which students need to work on which CPAC in the next practical so by the end of all practicals, they should get all green!

That is all! I hope this is easy and helpful!
Written on iPad Pro & annotated using Apple Pencil.